Welcome to LiveQ Documentation
LiveQ is an AI invisible assistant designed to help you manage meetings and tasks through voice-driven interaction. This documentation will guide you through every aspect of the platform, from installation to advanced agent configuration.
Desktop Agent
Your companion app for screen recording, audio capture, and real-time AI assistance during sessions.
Web Dashboard
The command center for managing agents, reviewing session analytics, and configuring your workspace.
Getting Started
Follow these steps to set up your LiveQ environment and start your first AI-assisted session.
1. Create an Account
Sign up on the web platform. You'll start with a free tier that includes 10 credits to explore the capabilities of our AI agents.
2. Download the Desktop App
The desktop application is required to capture audio and screen context for the AI.
3. Install & Permissions
After installation, launch the app. You will need to grant permissions for:
- Screen Recording: To see what you see.
- Microphone: To hear the conversation.
- Accessibility: For global hotkeys.
Desktop Application
The LiveQ Desktop App sits quietly in your background, ready to assist you whenever you need it.
Core Features
Global Shortcuts
- Hide/Show WindowCmd + H
- Toggle ThemeCmd + T
- Move WindowCmd + Arrows
- Adjust OpacityCmd + [ / ]
- Switch MonitorCmd + Shift + M
Smart Context
The app intelligently captures screen content and audio to provide context-aware suggestions without you having to type a prompt.
Session Management
When you start a session, the desktop app streams encrypted audio and visual data to our secure processing engine. You can pause or stop the session at any time from the floating control bar.
Note: All data is encrypted in transit and at rest. We prioritize client confidentiality above all else.
Zoom Settings
Zoom needs one extra setting before LiveQ is fully hidden from your screen share. It takes about 30 seconds and only has to be done once.
Why this is needed: Zoom's default screen capture mode ignores window filtering, so excluded windows can still appear in the shared picture. Switching to advanced capture makes Zoom respect the filter and keeps the LiveQ window out of the share.
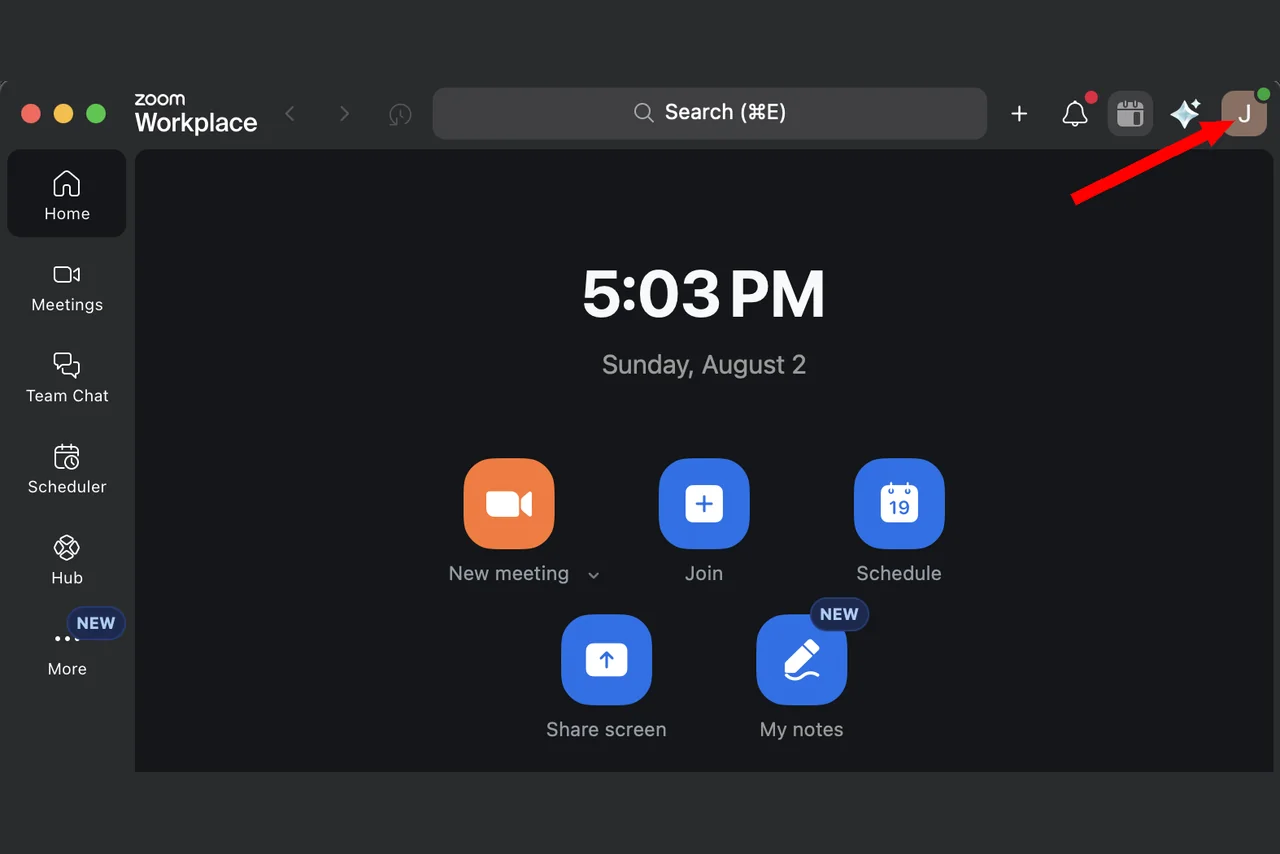
1Open your Zoom profile menu
In the Zoom desktop app, click your profile picture in the top-right corner.
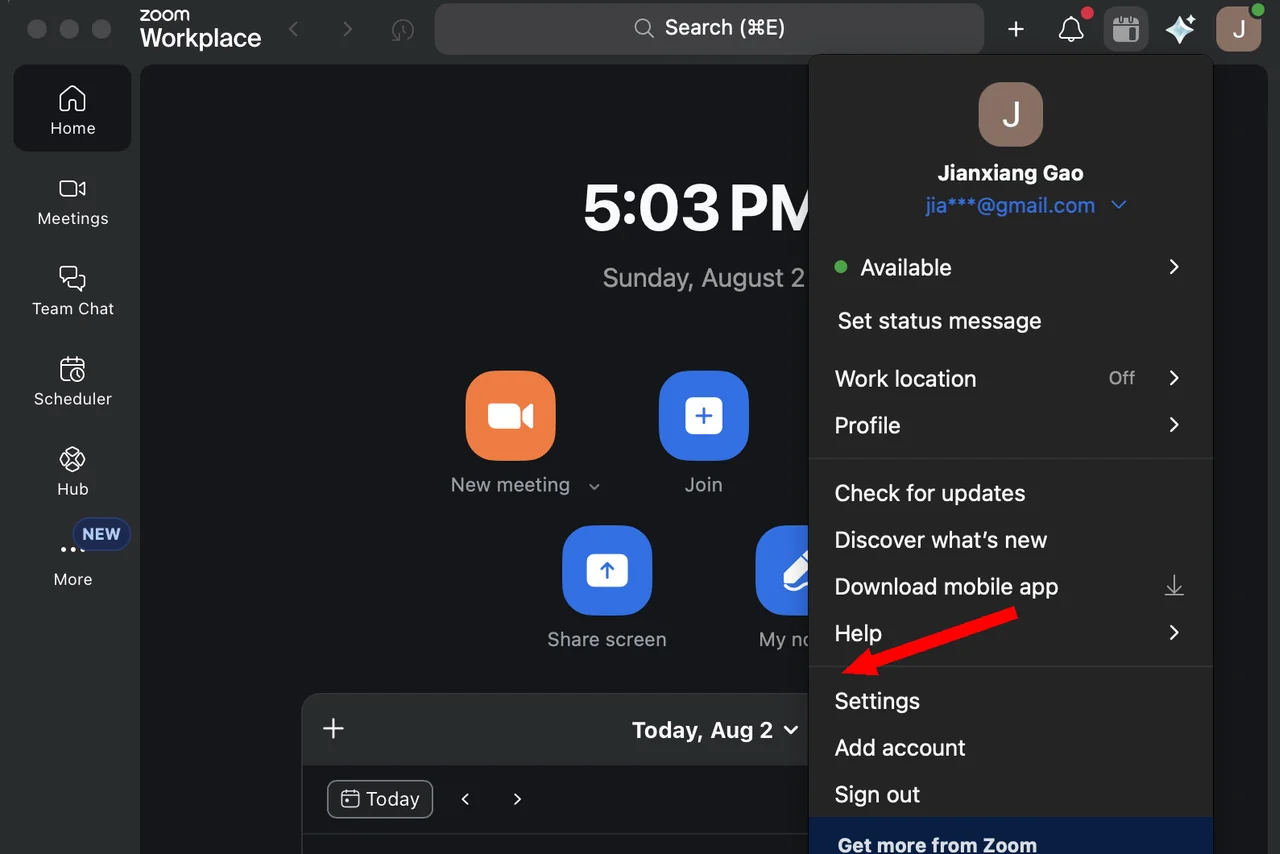
2Open Settings
Choose Settings from the dropdown menu.
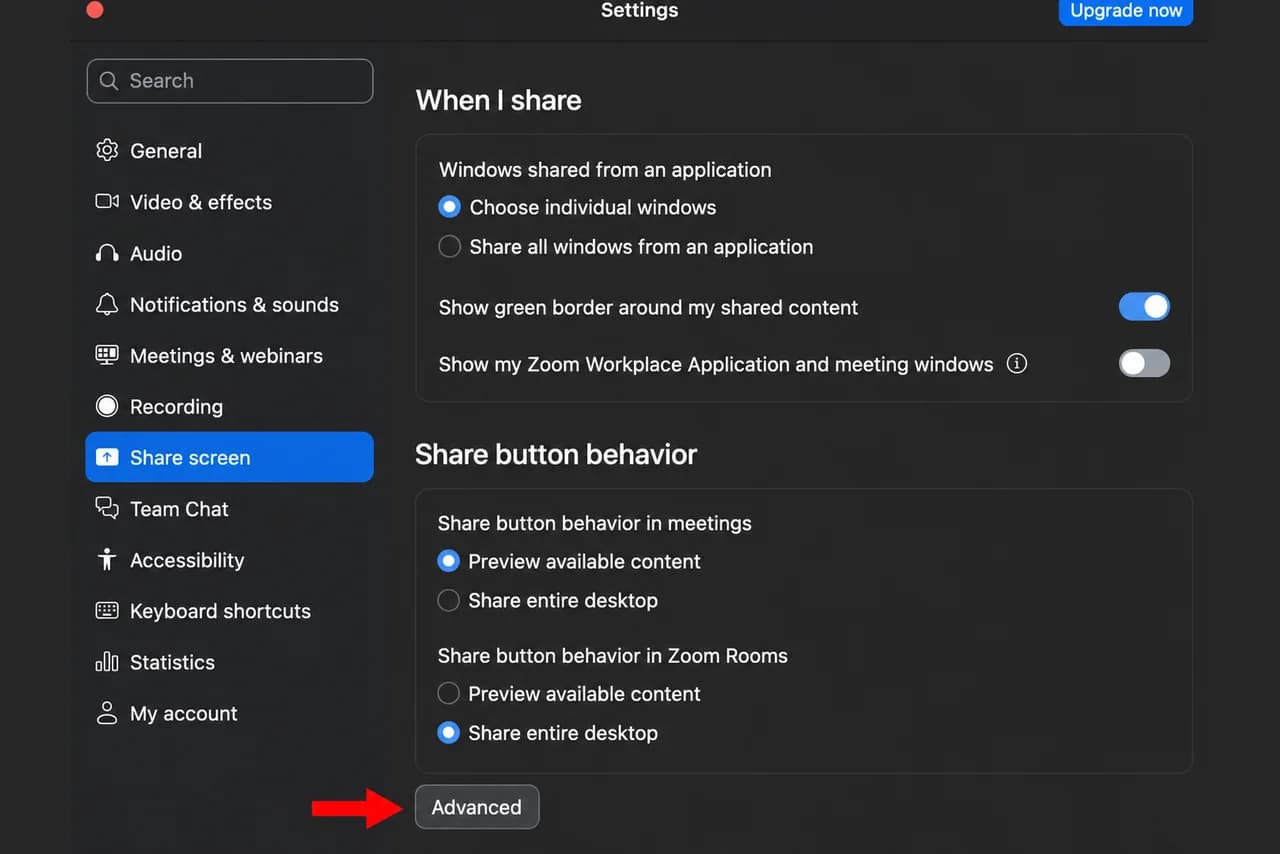
3Go to Share Screen, then Advanced
Select Share Screen in the left sidebar, then click the Advanced button at the bottom of the panel.
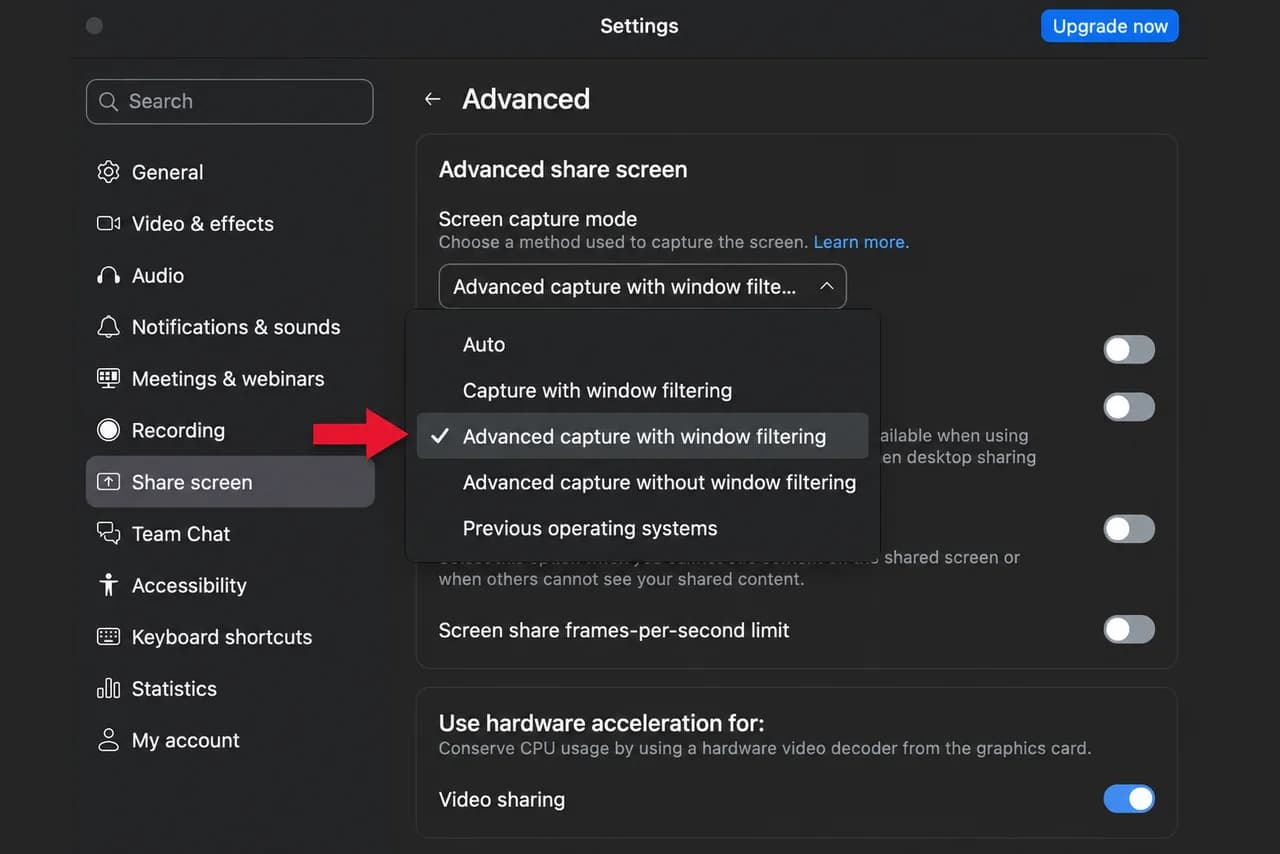
4Choose the right capture mode
Under Screen capture mode, select "Advanced capture with window filtering". Restart Zoom if the change does not take effect right away.
Web Dashboard
Your central hub for analytics, agent configuration, and session review.
Agents
Create custom AI agents tailored to specific interview types, meetings, or conversation scenarios.
- System Prompts: Define the personality and expertise of your agent.
- Knowledge Base: Upload documents or guidelines for the agent to reference.
Sessions & Analytics
Review past sessions with detailed transcripts, sentiment analysis, and AI-generated insights.
Key Metrics
Creating & Using Agents
Unlock the full potential of LiveQ by creating custom agents tailored to your specific workflow, and seamlessly accessing them in the desktop application.
1. Create Agent in Web Dashboard
Navigate to the Agents section in the web dashboard and click "Create Agent".
Configuration
- Name: Give your agent a recognizable name (e.g., "Coding Interview Coach").
- Description: A brief summary of its purpose.
- Language: Select the primary language for interaction.
System Prompt
This is the "brain" of your agent. Define its persona, expertise, and constraints.
2. Use Agent in Desktop App
Once created, your agent is instantly available in the desktop application.
Launch & Login
Open the LiveQ Desktop App and ensure you are logged in.
Select Agent
In the dashboard view, locate the "AI Behavior" dropdown. Your new agent will appear in this list.
Start Session
Click "Start New Conversation". The AI will now use your custom prompt to guide its analysis and suggestions during the session.
Troubleshooting
Common solutions to technical issues you might encounter.
Permission Denied Errors
If the app cannot record screen or audio, macOS permissions might be reset.
- Open System Settings.
- Go to Privacy & Security.
- Check Screen Recording and Microphone.
- If LiveQ is checked, uncheck and re-check it, then restart the app.
Audio Not Capturing
Ensure the correct input device is selected in the Desktop App settings. Try toggling the mute button on the floating control bar.
Screen Share Black Screen
This usually happens if "Screen Recording" permission was denied. Follow the steps in "Permission Denied Errors" above.